How to Annotate

First you will need to take an image or a blank background to Image Magick in order to annotate on. You can make one on the IM input page by scrolling down to the bottom of the page and under size, put in an image size (you can always trim it if it is too big). Under Format click xc, and under Meta type in a color name. Then scroll up to the top and click view. Once inside an Image Magik Studio, you will see rows of links across the top of the page. Click on the button marked Annotate. You will be taken to a page with a text box and some features.

Setting Offset Parameters

annotate example
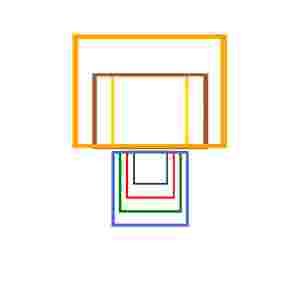
In this image I have tried to show how the offset parameters work. The numbers +0+0 that appear in the Offset box stand for width and height, or how far in pixels from the left and how far from the top. But other things factor in to where your image actually appears. I used these boxes to show this.
I hope this helps you with your offset numbers. Just remember that point size matters too in how the final image will appear.

Valid HTML 4.0 Transitional