| This Lesson covers ellipses and arcs. You can draw an outline of an ellipse with imageellipse($image,$x,$y,$width,$height,$color), or a filled ellipse with imagefilledellipse(). |
In this example, an imageellipse is drawn in black while the imagefilledellipse is drawn in red. Note that the imageellipse ignores the imagesetthickness. Therefore if you want a large outline, you would need to draw 2 filled ellipses on top of each other in different colors. Also note that the x,y is the center of the ellipse. The ellipse is 50,50 so it is drawn at 25 pixels around the diameter of the x,y point.

|
|
|
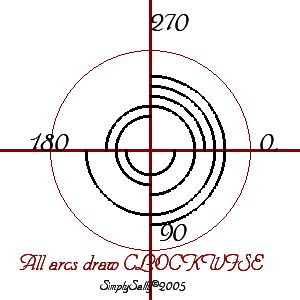
ImageArc takes more variables. They consist of the $x, $y, $width, $height, $start angle in degrees, $end angle in degrees, $color. From the manual: "The arc end angle, in degrees, 0° is located at the 3 o'clock position, and the arc is drawn clockwise (0-359.9 degrees). The imagearc command does use imagesetthickness so long as the lines do not overlap. |
The top arc is from 0-359.9. The middle arc is from 0-360. The bottom again from 0-359.9.
 |
|
|
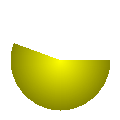
ImageFilledArc takes an extra parameter after the color for the style. From the manual: A bitwise OR of the following possibilities: (A bitwise OR is a | sign). IMG_ARC_PIE and IMG_ARC_CHORD are mutually exclusive; IMG_ARC_CHORD just connects the starting and ending angles with a straight line, while IMG_ARC_PIE produces a rounded edge. IMG_ARC_NOFILL indicates that the arc or chord should be outlined, not filled. IMG_ARC_EDGED, used together with IMG_ARC_NOFILL, indicates that the beginning and ending angles should be connected to the center - this is a good way to outline (rather than fill) a 'pie slice'. Going through the styles: |
Top image is just IMG_ARC_PIE
bottom image is the PIE used with the NOFILL and the CHORD which draws the line. Notice those 2 bottom lines of code have the same parameters with the OR sign.
 ; ;
|
imagesetthickness($image, 3);
imagefilledarc($image, 35, 10, 50, 50, 0,180, $black,IMG_ARC_PIE);
imagefilledarc($image, 35, 40, 50, 50, 0,180, $black,IMG_ARC_PIE|IMG_ARC_NOFILL);
imagefilledarc($image, 35, 40, 50, 50, 0,180, $red,IMG_ARC_CHORD|IMG_ARC_NOFILL);
IMG_ARC_EDGED seemed to work the same as IMG_ARC_PIE
|
A loop produces produces this image.

|
for ($i = 50; $i >= 40; $i--) {
imagefilledarc($image, 50, $i, 80, 50, 0, 45, $navy, IMG_ARC_NOFILL);
imagefilledarc($image, 50, $i, 80, 50, 45, 75 , $gray, IMG_ARC_NOFILL);
imagefilledarc($image, 50, $i, 80, 50, 75, 360 , $red, IMG_ARC_NOFILL);
}
|
Add the extra lines for 3D.
 |
|
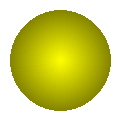
Ellipse loop

|
|
This uses 2 identical loops, but if you tried to use only 1 loop it would not come out the same.
|
|
Arc Loop
|
|
Ellipse loop
 |
|
This is the actual code used in the gradient script. Don't ask me about the color function.. 8-)
|
Right click, select all, ctrl+c to copy.
|
|
Got the radial gradient script working with the $IMG_ARC_PIE. I'll have to add it to my gradient script.
|
|
Right click, select all, ctrl+c to copy.
|
I found this code on line which draws a pie chart using IMG_ARC_EDGED.
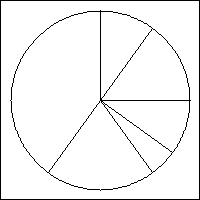
| Piechart Text
|
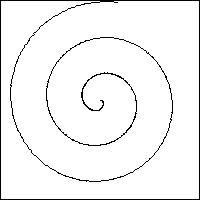 | Spiral Text
|